

Maintaining your vehicle’s braking system is crucial for ensuring safety on the road. This guide focuses specifically on the essential tasks of brake pad replacement and fluid maintenance. Understanding when and how to perform these services can not only prolong the life of your braking components but also enhance overall driving performance.
Brake pads are a critical part of the braking system, providing the necessary friction to slow down or stop your vehicle. Over time, these pads wear down due to regular use and must be replaced to avoid brake failure and maintain the effectiveness of your stopping power. In addition to pad replacement, the condition of the brake fluid is equally important. Brake fluid is essential for transmitting force from the brake pedal to the brake components, and ensuring that it is clean and at the correct level will help maintain effective braking performance.
This guide will provide you with a step-by-step approach to assessing your brake pads and fluid, detailing best practices for replacement and upkeep. Regular maintenance not only improves safety but also saves money by preventing extensive repairs down the line. Understanding your braking system empowers you to take action when needed, ensuring that your vehicle remains safe and reliable for every journey.
How to Check Brake Pads for Wear and Tear
Regular inspection of your brake pads is essential for maintaining optimal braking performance and overall vehicle safety. Here’s a step-by-step guide on how to check the condition of your brake pads.
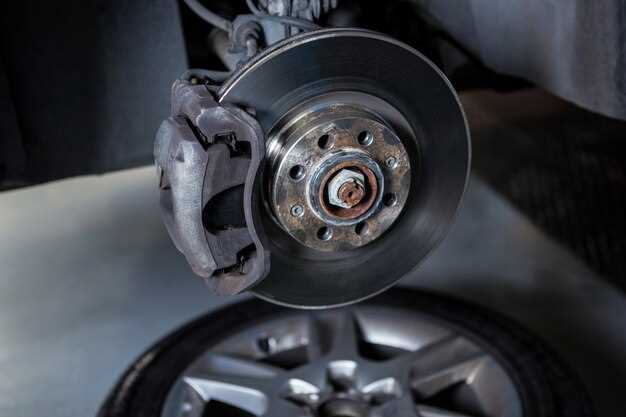
1. Visually Inspect the Pads: Start by removing the wheel to access the brake assembly. Look at the thickness of the brake pads. New pads typically measure between 10 to 12 millimeters in thickness. If the pads appear worn down to 3 millimeters or less, it’s time for a replacement.
2. Listen for Unusual Noises: Pay attention while driving. Squeaking or grinding noises when applying the brakes may indicate that the pads are worn out. The wear indicators on the pads might be making contact with the rotor, signaling the need for immediate replacement.
3. Check for Uneven Wear: Inspect each brake pad carefully. Uneven wear can suggest issues with the caliper or brake fluid problems. If any pad is significantly thinner than the others, further investigation is necessary.
4. Monitor Brake Fluid Levels: While checking the pads, also observe the brake fluid reservoir. Low fluid levels can affect brake performance and may indicate a leak or worn brake pads that require replacement.
5. Take Note of Brake Performance: If you experience a decrease in braking efficiency, such as longer stopping distances or a spongy pedal feel, it might be a sign that your brake pads are worn. Check both the pads and the fluid to ensure your braking system is functioning properly.
Regular maintenance and checks are crucial for your vehicle’s safety. Always refer to your vehicle’s manufacturer recommendations for check-up intervals and when it’s necessary to replace brake pads and fluid.
Steps to Properly Replace Brake Fluid
Start by gathering the necessary tools and materials, which include a brake fluid reservoir, a wrench, a brake bleeder kit, and new brake fluid compatible with your vehicle. Check your owner’s manual for specifications regarding the type of fluid required.
Next, locate the brake fluid reservoir under the hood of your vehicle. Ensure the vehicle is on a level surface and the engine is off. Clean the area around the reservoir cap to prevent contamination.
Remove the cap from the brake fluid reservoir and inspect the fluid level. If it appears dirty or has particles, it’s a clear indication that replacement is necessary. Always use fresh, unopened brake fluid to avoid any moisture or contamination issues.
Flush the old brake fluid from the system by using the brake bleeder kit. Starting with the brake farthest from the master cylinder, typically the rear passenger side, attach the bleeder kit to the bleeder valve on the brake caliper. Open the valve and allow old fluid to drain into a container. Keep an eye on the fluid level in the reservoir and refill as required to avoid introducing air into the system.
Repeat the bleeding process on each brake in the following order: rear passenger side, rear driver side, front passenger side, and front driver side. Ensure that all old fluid is removed and fresh fluid is circulating through each pad’s caliper.
Once all brakes have been bled, close each bleeder valve securely and make sure no fluid leaks are present. Replace the cap on the brake fluid reservoir and ensure it is tightly sealed.
Finally, pump your brake pedal several times to build pressure and check the lever’s responsiveness. This ensures that you have successfully replaced the brake fluid and that the system is functioning correctly. Dispose of the old brake fluid properly, as it is toxic and should not be poured down the drain.
Signs of Brake Problems to Watch For

Recognizing brake issues early is crucial for safety and performance. One of the most common indicators of brake problems is the presence of unusual noises. If you hear grinding, squealing, or squeaking sounds when applying the brakes, it’s likely a sign that your brake pads are worn out and need replacement.
Another significant sign is a change in the brake pedal feel. If the pedal feels softer, sinks to the floor, or becomes hard to press, it indicates potential issues with the brake fluid or the brake system itself. Additionally, any vibration or pulsating sensation when braking can signal that the brake pads or rotors are warped and require attention.
Check for warning lights on your dashboard as well. Many modern vehicles are equipped with indicators that alert drivers to brake system malfunctions. If you see a brake warning light, don’t ignore it; consult a mechanic promptly.
Uneven wear on brake pads is another critical sign. If you notice that one side of the pad is more worn than the other, it may indicate problems with the caliper or suspension alignment. Regular inspections can help catch these issues early.
Finally, pay attention to any changes in your vehicle’s stopping distance. If your car takes longer to come to a stop than it used to, this change can signify that brake maintenance is needed. Make sure to have brakes inspected regularly to ensure optimal performance and safety.