

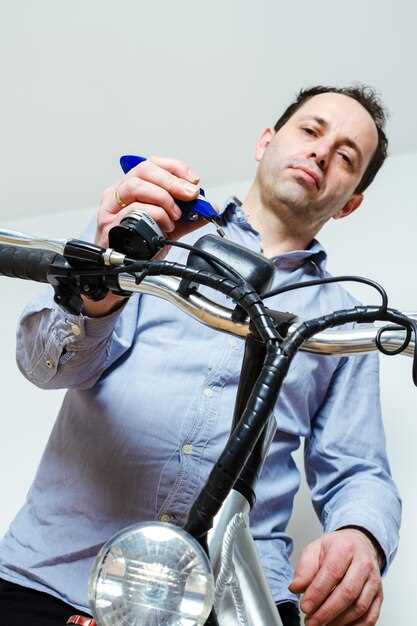
As a new rider, understanding the importance of maintenance is crucial for ensuring both the longevity of your motorcycle and your own safety on the road. Regular maintenance can help you avoid costly repairs and unexpected breakdowns, allowing you to enjoy your riding experience to the fullest. With the right knowledge and approach, you can develop a maintenance routine that fits your skill level and schedule.
For beginner riders, the world of motorcycle maintenance may seem daunting. However, familiarizing yourself with the basics will not only enhance your confidence but also deepen your connection with your bike. From checking the oil levels to inspecting the brakes, understanding these fundamental tasks empowers you to keep your motorcycle in optimal condition.
This article aims to provide essential maintenance tips specifically tailored for new riders. By integrating these practices into your riding routine, you can ensure that your motorcycle remains reliable and performs at its best. Whether you’re commuting to work or embarking on a weekend adventure, proper maintenance will enhance your overall riding experience.
How to Check and Change Motorcycle Oil
Regular oil checks and changes are essential for all riders, especially new motorcyclists. Maintenance of your motorcycle’s engine relies heavily on proper oil management. Here’s a step-by-step guide on how to check and change your motorcycle oil.
First, ensure your motorcycle is on a level surface and the engine is warm but not hot. This helps the oil to circulate and provides a more accurate reading. To check the oil level, locate the dipstick or inspection window, depending on your motorcycle model. If there’s a dipstick, remove it, clean it off, and insert it back without tightening. Remove it again to see the oil level. It should be within the recommended range. If using a window, simply observe the oil level through the glass.
If the oil level is low, it’s time to change it. Start by gathering necessary tools and materials: an oil filter wrench, a socket set, a drain pan, new oil, and a new oil filter compatible with your motorcycle model. Always refer to your owner’s manual for specific details on oil type and capacity.
Next, warm up the engine for a few minutes to thin the oil, allowing it to drain more easily. Then turn off the engine and allow it to sit for a minute. Position the drain pan under the oil pan and remove the drain plug using a socket wrench. Let the old oil fully drain into the pan.
Once the oil has drained, remove the old oil filter using the oil filter wrench. Apply a small amount of new oil to the rubber gasket of the new filter, then install it according to the manufacturer’s instructions.
After replacing the filter, reinstall the drain plug securely. Pour new oil into the engine through the filler cap, using a funnel to avoid spills. Be cautious not to overfill; stop when you’ve added the recommended amount. Start the engine and let it run for a minute, then check the oil level again using the dipstick or inspection window. Add more oil if necessary.
Regularly checking and changing your motorcycle oil not only enhances performance but also extends the life of the engine. For new riders, understanding this maintenance process builds confidence and promotes responsible bike ownership.
Understanding Tire Pressure and Tread Wear
Tire pressure is a critical aspect of motorcycle maintenance that directly impacts safety and performance. For beginner riders, it is essential to check the tire pressure regularly, as improper inflation can lead to handling issues, reduced fuel efficiency, and increased wear on tires. Most motorcycles have recommended pressure levels, which can typically be found in the owner’s manual or on a sticker located on the motorcycle itself.
Maintaining the correct tire pressure is vital for optimal contact with the road. Under-inflated tires can cause poor traction, while over-inflated tires may lead to a harsh ride and decreased grip. Use a reliable tire pressure gauge to check the pressure when the tires are cold, as tire temperature can affect readings after riding.
Tread wear is another critical factor that beginner riders must monitor. The tread on your motorcycle tires provides grip and stability on various road surfaces. Inspect the tires regularly for signs of wear, such as uneven tread, excessive wear indicators, or any cracks and damage. Most motorcycle tires have built-in wear indicators, which are small raised sections that become level with the tread surface when the tire is worn down.
If the tread depth reaches the wear indicators, it is time to replace the tires. Riding on worn tires not only compromises safety but can also lead to poor handling and increased stopping distances. For beginners, understanding the relationship between tire pressure and tread wear is vital for maintaining a safe and enjoyable riding experience on their motorcycle.
Simple Techniques for Cleaning and Lubricating the Chain

Proper maintenance of your motorcycle chain is essential for new riders to ensure smooth performance and extend the lifespan of the chain. Regular cleaning and lubrication will prevent rust and wear, enhancing safety on the road.
Begin by gathering the necessary tools: a chain cleaner, a brush, a rag, and a suitable chain lubricant. Start by placing your motorcycle on a stable surface, ideally on a center stand or with a paddock stand to allow for easy rotation of the rear wheel.
Using the chain cleaner, apply it generously to the chain while spinning the rear wheel slowly. This helps remove dirt, grime, and old lubricant. Employ the brush to scrub away stubborn debris, focusing on areas that collect the most dirt. Rinse thoroughly with water, but avoid spraying directly on the wheel bearings and other sensitive components.
Once the chain is clean, dry it carefully with a rag. Ensuring the chain is completely dry is crucial before applying lubricant. Apply the chain lubricant evenly while rotating the rear wheel again. It’s important to target the inside of the chain as well, where the rollers make contact with the sprockets.
After lubrication, allow the chain to sit for a few minutes to let the lubricant penetrate. Then, wipe off any excess lubricant with a clean rag to prevent it from attracting dirt. Regularly cleaning and lubricating your motorcycle chain not only enhances performance but also builds good maintenance habits for new riders.