

Maintaining your motorcycle’s braking system is crucial for safety and performance, and one of the most important aspects of this maintenance is the replacement of brake pads. Over time, brake pads wear down due to friction and heat generated during braking, which can significantly impact your motorcycle’s stopping power. Understanding when and how to replace these pads is essential for every rider.
Brake pads are essential components that provide the necessary friction to slow down or stop your motorcycle. Regular inspection of your brake pads can help you identify signs of wear, such as thinning material or uneven surfaces. Knowing when to perform a replacement not only ensures optimal braking performance but also extends the life of other components such as rotors.
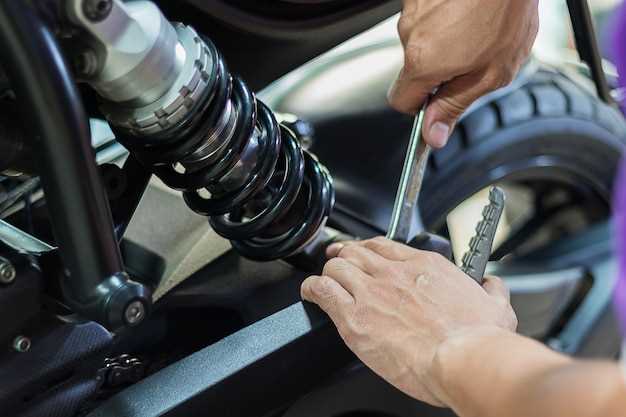
This guide will walk you through the step-by-step process of replacing your motorcycle’s brake pads. We will cover essential tools, safety precautions, and tips for a successful replacement, allowing you to tackle this task with confidence. Whether you’re a seasoned rider or a beginner, understanding how to properly replace your brake pads will enhance your riding experience and ensure your safety on the road.
Choosing the Right Brake Pads for Your Motorcycle
Selecting the appropriate brake pads for your motorcycle is crucial for optimal performance and safety. Different types of brake pads cater to various riding styles, conditions, and preferences. Understanding the materials used in brake pads is essential when making your choice.
There are primarily three types of brake pad materials: organic, metallic, and ceramic. Organic pads, made from fibers and resins, provide a quiet operation and are suited for everyday street riding. However, they wear out faster under heavy braking conditions. Metallic pads, often composed of sintered metals, offer superior heat resistance and longevity but can produce noise and may be harsher on rotors. Ceramic pads strike a balance, providing quiet performance with stable braking in various conditions, although they can be pricier.
Your riding style greatly influences the type of brake pads you should choose. For aggressive riding or track use, metallic pads are often preferred due to their consistent braking power at high temperatures. For casual riders or those commuting, organic pads might offer sufficient performance with less rotor wear.
Furthermore, consider the specific requirements of your motorcycle. Some models may have recommendations regarding brake pad types. Always verify compatibility and consult your owner’s manual before purchasing. Checking for quality certifications and user reviews can also guide your decision, ensuring reliable and effective braking performance.
Lastly, evaluate your budget. While it might be tempting to opt for cheaper brake pads, investing in high-quality pads can provide enhanced safety and prolong the life of your motorcycle’s braking system. Prioritize durability and performance over initial cost for a worthwhile long-term investment.
Step-by-Step Process for Replacing Brake Pads

Replacing brake pads is essential for maintaining optimal braking performance on your motorcycle. Follow these steps to ensure a safe and effective replacement process.
Step 1: Gather Tools and Materials
Collect all necessary tools, including a socket set, torque wrench, brake cleaner, and new brake pads. Make sure to have safety gear, like gloves and goggles, for protection.
Step 2: Prepare the Motorcycle
Ensure the motorcycle is on a stable surface, using a bike stand if available. Remove any components obstructing access to the brake caliper, such as the wheel or fender, depending on your bike model.
Step 3: Remove the Brake Caliper
Use a socket wrench to unscrew the bolts holding the brake caliper in place. Carefully detach the caliper from the mounting bracket and avoid letting it hang by the brake line to prevent damage.
Step 4: Extract Old Brake Pads
Slide out the old brake pads from the caliper. Take note of their position to ensure the new pads are installed correctly.
Step 5: Clean the Caliper and Components
Use brake cleaner to thoroughly clean the caliper and any other components. This helps remove dust, grease, and debris that can affect performance.
Step 6: Install New Brake Pads
Insert the new brake pads into the caliper, positioning them in the same manner as the old ones. Make sure they fit snugly against the caliper piston.
Step 7: Reattach the Brake Caliper
Position the caliper back onto the mounting bracket and secure it with the original bolts. Use a torque wrench to tighten the bolts to the manufacturer’s specifications, which ensures proper stability.
Step 8: Reassemble Components
If you removed any additional components, reattach them carefully. Ensure everything is properly lined up and securely fastened.
Step 9: Test the Brake System
Before riding, pump the brake lever to seat the new pads against the rotor. Check for any unusual noises or issues in the braking system.
Step 10: Final Inspection
Finally, inspect the brake assembly visually for proper alignment and secure fittings. Ensure there are no leaks present from the caliper.
Common Mistakes to Avoid During Brake Replacement
Replacing motorcycle brake pads is a critical maintenance task that ensures your safety on the road. However, there are several common mistakes that riders often make during this process. Avoiding these errors will help you achieve a successful brake replacement and maintain optimal braking performance.
1. Ignoring Manufacturer Specifications
One of the most significant mistakes is not following the manufacturer’s specifications for brake pad replacement. Each motorcycle model has its own unique requirements for brake pads, including dimensions and materials. Failing to adhere to these guidelines can lead to improper fit and reduced braking efficiency.
2. Overlooking Brake Caliper Inspection
Before replacing brake pads, it’s crucial to inspect the brake calipers for any signs of wear or damage. Some riders neglect this step, leading to unsafe braking conditions. Look for leaking brake fluid, rust, or any physical damage to the caliper, and replace or repair it as needed before installing new pads.
3. Using Incompatible Brake Pads
Choosing the wrong type of brake pad can significantly affect the performance and safety of your motorcycle. It’s essential to select pads that are compatible with your braking system. For instance, organic pads are better for street use, while sintered pads may be more suitable for aggressive riding. Check compatibility before making a purchase.
4. Failing to Clean Brake Components
A common oversight is not thoroughly cleaning the brake components before installing new pads. Residue from old pads, dirt, and debris can interfere with proper pad function. Always clean the rotor and caliper to ensure the new pads can perform effectively and prolong their lifespan.
5. Skipping the Bedding-In Process
Many riders neglect the bedding-in process after installing new brake pads. Proper bedding allows the pads to form a strong bond with the rotor, optimizing their performance. Skipping this step can lead to increased stopping distances and reduced braking efficiency. Follow manufacturer recommendations for the bedding-in procedure to achieve the best results.
6. Not Checking Brake Fluid Levels
During brake pad replacement, it’s also essential to check the brake fluid levels. Often, fluid levels will change after pad installation, especially if the calipers are pushed back. Low brake fluid can compromise braking performance, so make sure to top it off as necessary and check for any leaks in the system.
By avoiding these common mistakes, you can ensure a safer and more effective brake pad replacement process. A little attention to detail can go a long way in maintaining your motorcycle’s braking system.